Ensuring your Zoom microphone performs at its best is crucial for high-quality audio recordings or during video conferences. Whether you’re a podcaster, a professional looking to improve your online meeting experience, or a videographer aiming for crystal clear audio capture, knowing how to test your Zoom microphone can greatly enhance the final output. This guide offers practical steps and tips on effectively testing your microphone to achieve optimal audio performance.
Starting with Basic Setup and Adjustment
Correct Microphone Placement
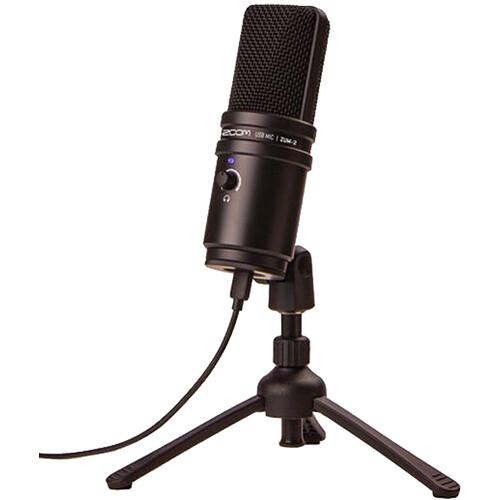
One of the most straightforward yet significant steps you can take to ensure good audio quality is positioning your Zoom microphone correctly. It should ideally be placed about six inches away from the speaker’s mouth, directly in front, to capture clear audio without picking up too many ambient sounds. Experiment with slight adjustments to find the best position that offers clarity while minimizing pops or breathing sounds.
Adjusting Input Levels
Too high or too low input levels can compromise the quality of your audio. Most Zoom microphones have a gain control feature, allowing you to adjust the input level. Before recording or joining a call, test speaking at varying volumes to see how the mic picks up sound. Adjust the gain until your voice sounds clear and consistent without distortion or clipping. This ensures that the audio remains even and professional during recordings or live sessions.

Utilizing Built-In and Third-Party Testing Tools
Using Zoom’s Audio Testing Features
Zoom offers a convenient audio testing feature within its settings, allowing users to test their microphone in a real-time scenario before joining or starting a meeting. This tool plays back the audio after recording it, helping identify any issues with clarity, volume, or background noise. Regularly utilizing this feature before critical meetings or recording sessions can help catch and rectify potential audio problems early.
Leveraging Third-Party Applications for Advanced Testing
For those requiring more detailed insights into their microphone’s performance, third-party audio testing software can be invaluable. Applications like Audacity or Adobe Audition offer advanced features like live monitoring, spectrum analysis, and recording tests. These tools provide a more nuanced understanding of your microphone’s capabilities and limitations, allowing for fine-tuning that can elevate the overall audio experience.
Dealing with Common Audio Issues
Tackling Background Noise
Ambient or background noise is a common challenge that can degrade audio quality. After identifying the presence of unwanted noise through testing, consider using noise-reduction features available in your Zoom microphone settings or third-party software. Additionally, simple changes in your recording environment, such as closing windows, turning off fans, or using a microphone with a directional pickup pattern, can significantly reduce noise interference.
Addressing Echo and Feedback
Echo and feedback can disrupt communication, making it difficult for listeners to understand the audio. These issues often arise from improper microphone settings or issues with the room acoustics. Using headphones during calls can eliminate feedback loops, and testing different microphone angles can help minimize echo. For persistent issues, acoustic treatments like foam panels may be necessary to improve room acoustics for optimal audio capture.
Regular Maintenance for Consistent Audio Quality
Cleaning and Storage
Regularly cleaning your Zoom microphone and storing it properly when not in use can greatly impact its longevity and performance. Dust and debris can accumulate on the mic’s diaphragm, affecting sound quality. Gently wiping your microphone with appropriate cleaning tools and following the manufacturer’s guidelines for storage ensures that the device remains in the best condition for high-quality audio capture.
Firmware Updates and Technical Checks
Staying up-to-date with firmware updates for your Zoom microphone can enhance its functionality and performance. Manufacturers often release updates that improve sound quality, add new features, or fix known issues. Additionally, periodically check your microphone’s cables, connectors, and any additional equipment for signs of wear or damage that could affect audio quality, replacing parts as necessary to maintain optimal performance.
Fine-Tuning with Equalization and Enhancement
Tailoring Sound with EQ
Every voice and recording environment is unique, and sometimes, the default microphone settings need tweaking to capture the best sound. Equalization (EQ) is a powerful feature that allows you to adjust the balance of different frequency ranges within your audio. Use it to enhance speech clarity by gently boosting mid-range frequencies, or to reduce low-frequency rumbles and high-pitched hisses. Testing your microphone with various EQ settings in your recording software can significantly improve vocal presence and intelligibility.
Utilizing Audio Enhancements
Most advanced recording software offers audio enhancement plugins that can be used to refine your microphone’s output. Compression can even out your audio levels, while a de-esser can tame harsh sibilance from your recordings. Use these tools sparingly during testing to find the right combination that brings out the best in your voice without sounding over-processed.
Real-World Testing Scenarios
Simulating the End-User Experience
To get a truly comprehensive understanding of your microphone’s performance, simulate the conditions under which your audience will hear the audio. For podcasters, this might mean listening to your recordings on different devices, such as smartphones, laptops, and car audio systems, to ensure consistency across platforms. Videographers should test how the mic captures sound in various filming scenarios, such as quiet indoor dialogues or action-packed outdoor scenes. This will reveal how the microphone handles different acoustics and background noises.
Gaining Feedback from Peers
Another valuable step in your testing process is to obtain feedback from peers or your target audience. What sounds right to you might not be the best experience for others. Share your test recordings with colleagues or a trusted group and ask for their honest opinions on the audio quality. This collaborative approach can uncover aspects you may have overlooked and offer insights that further refine your microphone’s performance.
Mastering the art of testing your Zoom microphone not only ensures that your audio recordings and live communications are of the highest quality but also allows you to troubleshoot and address common audio issues effectively. By following these guidelines, you can maximize the performance of your audio equipment, leading to clearer, more professional sound that enhances your overall multimedia projects or communication efforts. Whether for professional use or personal projects, optimal audio performance is achievable with a little know-how and regular maintenance.
