Identifying Common Vacuum Cleaner Issues
How to fix a vacuum cleaner? Identifying common vacuum cleaner issues is the first step in knowing how to fix a vacuum cleaner. When your vacuum cleaner isn’t working as it should, consider these common problems:

- Loss of Suction: This is often due to a full bag or a clogged filter. It could also be caused by a blocked hose or faulty seals.
- Strange Noises: Rattling or whistling sounds might indicate an object is stuck somewhere within the vacuum. If you hear buzzing or grinding, the motor or the brush roll could be the culprits.
- Vacuum Not Turning On: Check for a tripped circuit breaker, a damaged cord, or a malfunctioning power switch.
- Burning Smell: This could signal a trapped item, a jammed roller brush or issues with the vacuum’s belt. Prompt attention is important as it could indicate a fire hazard.
For each one of these problems, there are specific steps that can be taken to troubleshoot and resolve the issue, ensuring your vacuum cleaner gets back to working order. Keep these common issues in mind as we delve into more detailed repair steps further in our guide.
Essential Tools and Supplies for Vacuum Repair
When setting out to learn how to fix a vacuum cleaner, having the right tools and supplies is crucial. Here’s a list to get you started on your vacuum repair journey:
- Screwdrivers: A set of both flathead and Phillips screwdrivers is essential for disassembly and reassembly.
- Pliers: Needle-nose pliers can help to remove objects that are clogging the vacuum.
- Cleaning Brushes: Small brushes are great for dusting off components and unclogging filters.
- Replacement Bags and Filters: Have spares of these to restore suction power if they’re the issue.
- A Multimeter: This device can check the electrical continuity of your vacuum’s power cord and motor.
- Splicing Kit: For repairs to a damaged cord, you might need a wire stripper and electrical tape or wire nuts.
- Motor Lubricant: A specialized lubricant can keep the vacuum motor running smoothly.
- A New Belt: If the belt has snapped or worn out, a replacement is necessary.
- A Flashlight: To see into the dark spaces inside your vacuum.
These tools and supplies can help you address a wide range of issues. Keep them ready for whenever your vacuum cleaner show signs of trouble. With the right tools in hand, you’re one step closer to fixing common vacuum cleaner problems.
Step-by-Step Guide to Unclogging a Vacuum
If your vacuum has lost suction, chances are, it might be clogged. Finding and fixing a clog is one of the key skills in learning how to fix a vacuum cleaner. Follow these steps to get your vacuum back in action:
- Unplug the Vacuum: Safety first. Always unplug your vacuum cleaner before starting any repairs.
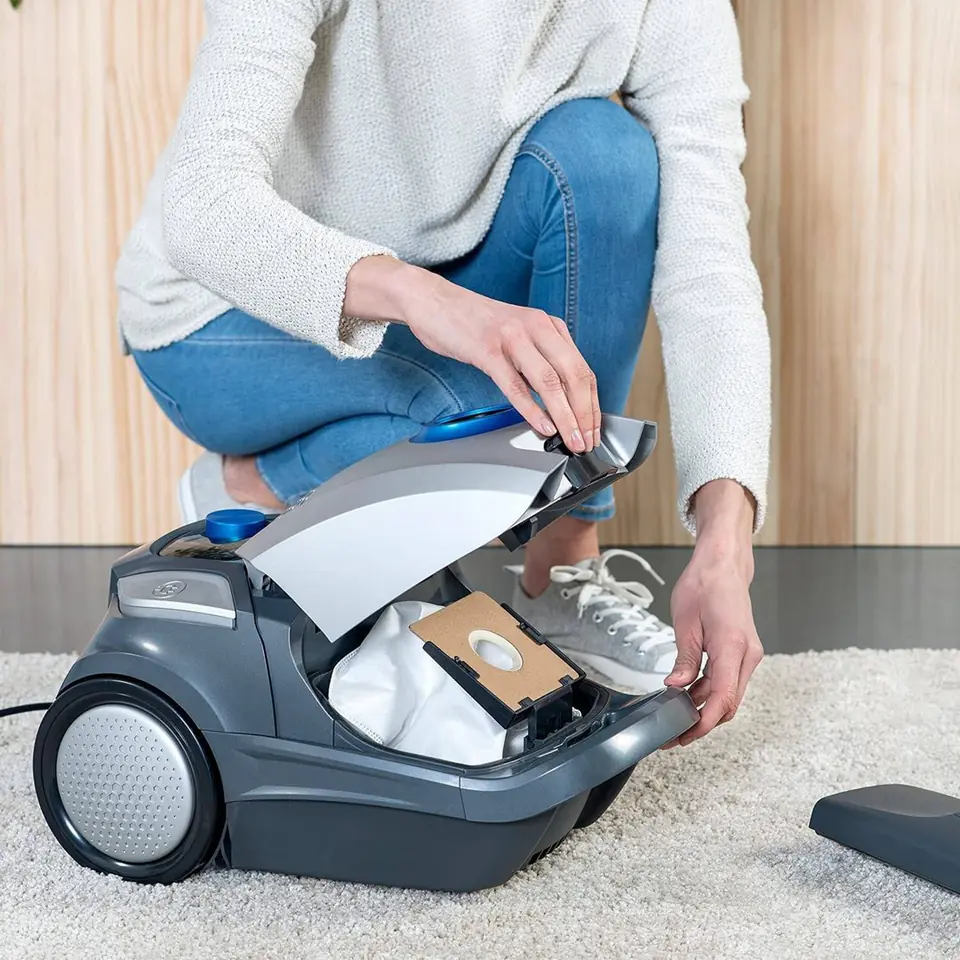
- Empty the Bag or Canister: Remove and empty the vacuum’s bag or dust canister to ensure the clog isn’t just a sign of a full vacuum.
- Check the Hose: Detach the hose and look through it for blockages. Shine a flashlight through from one end to check more easily.
- Clear the Hose: If you see a clog, use a long, slender tool, like a broom handle, to gently push out the debris.
- Inspect the Suction Path: Open up the vacuum as per the manufacturer’s instructions. Check the pathway that the dirt travels for any obstructions.
- Clean or Replace the Filter: A dirty filter can simulate a clog. Take it out, clean it according to the instructions, or replace it if necessary.
- Test the Vacuum: After clearing possible blockages and reassembling the unit, plug in the vacuum and test it.
By methodically checking each potential trouble spot, you can often unclog a vacuum without needing professional help. Remember to use your tools carefully and refer to your vacuum’s manual as needed while performing these steps. Keep your work area clean and organized to avoid losing any parts. Happy unclogging!

Troubleshooting Vacuum Suction Problems
If you’re noticing a drop in your vacuum’s suction power, there’s a series of steps to take. Begin by checking the most common sources of trouble. This structured approach often resolves the problem without needing to call in a professional. Here’s how to troubleshoot suction issues step by step.
- Examine the Bag or Bin: If your vacuum’s bag or bin is full, replace or empty it. A full container can prevent proper suction.
- Look at the Filters: Dirty filters can block airflow. Check and clean or replace them as needed. Refer to the manual for the correct way to do this.
- Inspect the Hose for Blockages: Disconnect the hose and check for obstructions. Remove any debris that might be restricting the airflow.
- Check Seals and Gaskets: Worn seals or gaskets can lead to air leaks. Examine them for damage and replace if necessary.
- Assess the Brush Roll: A tangled brush roll can affect suction. Clean it out and cut away any entangled hair or fibers.
- Test the Suction Path: Open up areas where dirt travels through the vacuum. Clear any hidden blockages you may find.
- Ensure Proper Assembly: If you’ve taken the vacuum apart, make sure all parts are reassembled correctly. A vacuum not put back together securely can lose suction.
- Look for Cracks or Damage: Examine the vacuum’s body for any cracks that might be causing air to escape, reducing suction.
Following these steps should help restore your vacuum cleaner’s suction power. Remember to unplug the vacuum before you begin, and handle all components gently. With patience and a systematic approach, you can figure out how to fix a vacuum cleaner’s loss of suction.
Replacing or Cleaning Filters for Optimal Performance
Proper filter maintenance is key to a vacuum cleaner’s efficiency. Over time, dust and debris can clog filters, leading to a loss of suction power. To keep your vacuum running smoothly, here’s what you need to do:
- Locate the Filters: Find your vacuum’s filters. Check the manual if you’re not sure where they are.
- Remove Filters: Carefully take out the filters. Some vacuums have multiple filters, so be thorough.
- Dust Off the Filters: Gently tap the filters on a hard surface. This removes loose dirt.
- Rinse Washable Filters: If your filters are washable, rinse them under cold water. Don’t use soap.
- Air Dry the Filters: Lay the filters out to air dry completely. Avoid direct sunlight or heat sources.
- Replace Non-Washable Filters: If filters can’t be washed, you’ll need to replace them. Follow the manufacturer’s recommendations.
- Reinstall Filters: Once dry or with new ones, put the filters back in. Make sure they fit snugly.
- Regular Checks: Make a habit of checking filters regularly. Clean or replace them as needed for best performance.
By cleaning or replacing your vacuum filters, you maintain good airflow and suction. Remember, frequent checks and maintenance can prolong your vacuum cleaner’s life and keep it performing at its best. If you’re learning how to fix a vacuum cleaner, this step is simple but crucial for optimal performance.
Fixing or Replacing a Damaged Vacuum Belt
When your vacuum cleaner loses its edge, a key suspect could be a worn or broken belt. Here’s how to fix a vacuum cleaner belt issue.
- Unplug the Vacuum: Always start by unplugging your vacuum for safety.
- Access the Belt: Open the vacuum using a screwdriver to reach the belt area.
- Inspect the Belt: Look for signs of wear, tear, or breakage on the belt.
- Remove the Belt: If damaged, slide off the old belt from the brush roll and motor shaft.
- Place a New Belt: Hook the new belt over the motor shaft and then over the brush roll.
- Test the Fit: Make sure the belt is tight but not overly stretched.
- Reassemble the Vacuum: Put the vacuum parts back together securely.
- Test the Vacuum: Plug it in and turn it on to check if the brush roll spins.
A damaged belt can greatly reduce your vacuum’s performance. Replace belts as needed to keep your vacuum cleaner in good shape. Remember to check your manual for specific instructions on belt replacement for your vacuum model.
Electrical Checks: Safety Precautions and Solutions
When figuring out how to fix a vacuum cleaner, electrical safety is critical. Before performing any checks or repairs, unplug your vacuum. This prevents electric shock. Then, use a multimeter to do some simple tests. Check for current, voltage, and resistance. These measures tell you if electrical parts are in good shape.
Safety First: Unplugging and Handling Electrical Components
Always unplug the vacuum before you start. Handle wires and electrical parts with care. Wear rubber-soled shoes to reduce the risk of shock. Never work on your vacuum in damp areas.
Using a Multimeter to Diagnose Electrical Issues
Set your multimeter to the correct settings. Test the power cord for continuity first. Place probes on each end of the cord. If there’s no reading, the cord might be faulty. Next, check the vacuum’s switch. Place probes on the switch’s terminals. A reading means the switch works. No reading suggests it might be the problem.
Checking the Motor’s Health
The motor is essential for your vacuum. A multimeter can test if it’s the problem. Access the motor according to the manual. Probe its terminals with the multimeter. A very high resistance reading could mean the motor is burnt out and needs replacing.
Solutions for Electrical Repairs
For cord repairs, use a splicing kit to fix cuts or breaks. Replace a faulty switch with a new one. Be sure to get an exact match for your model. If the motor is bad, it’s often best to seek professional help. Motors are complex and can be dangerous to replace.
Electrical checks are a key part of learning how to fix a vacuum cleaner. With these precautions and solutions, you can safely address electrical issues in your vacuum.
When to Seek Professional Help for Vacuum Repairs
In learning how to fix a vacuum cleaner, some issues are better left to professionals. When you’ve tried troubleshooting and repairs with no luck, it’s time to consider professional help. Here are situations when you should seek an expert:
- Complex Motor Issues: If testing suggests a burnt-out motor, professionals should handle the replacement.
- Electrical Problems: For intricate wiring issues or if you’re uncomfortable with electrical work, seek an expert.
- Broken Internal Components: When internal parts are damaged beyond DIY repair, a professional can help.
- Under Warranty: If your vacuum is still under warranty, professional repairs may be covered.
- Repeated Issues: When problems persist after repeated attempts to fix them, a professional’s insight is needed.
Experts have the right tools, knowledge, and experience to diagnose and repair vacuum cleaners efficiently. If you’re unsure or the repair seems too complex, contact a vacuum repair service to ensure your machine is safely and effectively restored to optimal performance.


